
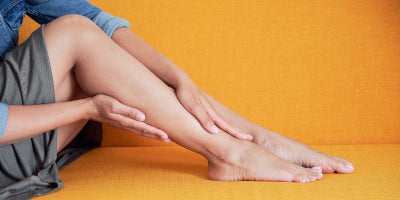
Ultimate Guide To Kinesiology Tape

Welcome to the "Ultimate Guide to Kinesiology Tape," your comprehensive resource for understanding and utilizing this versatile muscle tape. In this blog, we will demystify the world of kinesiology tape, also known as kinesio tape, starting with a clear explanation of what it is and its various uses. We'll delve into the science behind how kinesiology tape works, exploring its mechanisms and benefits in supporting muscles and joints. Finally, we will provide a step-by-step guide on how to apply kinesiology tape, ensuring you can maximize its effectiveness for injury prevention and recovery. Whether you're an athlete, a physical therapist, or someone seeking pain relief, this guide has everything you need to harness the power of kinesiology tape.
What is Kinesio Tape?
Kinesiology tape, often recognized by its colourful and distinctive patterns, is a therapeutic tape used for treating injuries and a variety of physical disorders. Developed in the 1970s by Dr. Kenzo Kase, a Japanese chiropractor and acupuncturist, kinesiology tape was designed to support injured muscles and joints without restricting movement. Dr. Kase sought a method that could extend the benefits of his treatments beyond the clinic, leading to the creation of this revolutionary tape.
History of kinesiology tape
The inception of kinesiology tape can be traced back to Dr. Kase's desire to find a solution that would offer support and rehabilitation for his patients in between their treatments. Traditional athletic tape was rigid and designed to immobilize the affected area, which, while beneficial in preventing further injury, often restricted movement and could impede the body's natural healing process. Dr. Kase's innovation lay in creating a muscle tape that mimicked the skin's elasticity, allowing for dynamic support that facilitated movement while still providing therapeutic benefits.
Since its introduction, kinesio tape has gained significant popularity, especially after high-profile athletes began using it during major sporting events. Its visibility in the 2008 Beijing Olympics and subsequent competitions catapulted it into mainstream use, making it a staple in both professional sports and everyday physical therapy.
What Makes Kinesiology Tape Different?
Kinesiology tape stands apart from traditional athletic tapes and other medical tapes due to several key characteristics:
Elasticity and Flexibility: Unlike conventional tapes, kinesio tape stretches up to 40-60% of its original length. This elasticity allows the tape to move with the body, providing support without restricting the range of motion.
Breathable and Water-Resistant: Made from a blend of cotton and nylon fibres, kinesiology tape is designed to be breathable and water-resistant. This ensures comfort during prolonged use and in various environmental conditions, including water sports and intense workouts.
Adhesive Properties: The adhesive used in kinesio tape is acrylic-based, which is hypoallergenic and heat-activated. This makes it gentle on the skin while ensuring it stays in place through sweating and activity.
Therapeutic Benefits: Kinesiology tape works by lifting the skin microscopically, which can help reduce pain and inflammation, improve circulation, and aid in lymphatic drainage. This unique mechanism sets it apart from rigid tapes that merely provide structural support.
Versatility in Application: The tape can be applied in various patterns and shapes to target different muscle groups and injuries. Its versatility allows it to be used for a wide range of conditions, from muscle strains and ligament injuries to improving posture and reducing swelling.
Kinesio tape is a modern therapeutic tool that combines flexibility, comfort, and support to aid in the recovery and prevention of injuries. Its unique properties and history of development highlight its significance in the realms of sports medicine and physical therapy.
How Does Kinesiology Tape Work?
Kinesiology tape is more than just a sports tape for athletes; it is a scientifically designed tool that offers therapeutic benefits by interacting with the body's physiology. Understanding how kinesio tape works involves delving into its unique properties and the mechanisms through which it aids in healing and performance.
What does kinesio tape do?
Skin-Lifting Effect: One of the primary ways kinesiology tape works is by lifting the skin slightly away from the underlying tissues. This lift creates a microscopic space between the skin and the muscle, which helps alleviate pressure and allows for improved blood and lymphatic fluid flow. Enhanced circulation aids in reducing inflammation and promoting faster healing.
Pain Reduction: By lifting the skin and creating more space, kinesio tape can reduce the pressure on pain receptors located in the underlying tissues. This helps in diminishing the sensation of pain, providing relief from discomfort associated with injuries or overuse.
Supporting Muscles and Joints: Kinesiology tape provides support and stability to muscles and joints without restricting movement. The tape's elasticity mirrors the skin's natural elasticity, allowing for dynamic support that moves with the body. This can help prevent over-extension or over-contraction of muscles and joints, reducing the risk of further injury.
Enhanced Proprioception: Proprioception is the body's ability to sense its position and movement in space. Kinesio tape enhances proprioceptive feedback by stimulating the skin and underlying tissues. This improved awareness can help in maintaining proper posture and alignment, reducing the likelihood of injury during physical activity.
Facilitating Muscle Contraction and Relaxation: Depending on how kinesiology tape is applied, it can either facilitate or inhibit muscle contraction. By strategically placing the tape along the direction of the muscle fibres, it can enhance muscle contraction, aiding performance. Conversely, applying the tape in a manner that opposes the muscle fibres can help relax overactive muscles.
Neo G Kinesiology Tape
Our NeoTape is a versatile kinesiology tape designed to provide support and relief for muscle and joint pain, swelling, tendinitis, and sprains. Made from a soft, breathable, and hypoallergenic material, it ensures comfort and durability, lasting up to four days even during regular activities. The tape includes a visual tension guide to aid in proper application, ensuring effectiveness. NeoTape is water-resistant and suitable for use on various body parts such as the ankle, knee, shoulder, and more, making it ideal for both everyday and athletic use.
How To Apply Kinesiology Tape
Applying kinesiology tape effectively requires understanding its versatility and the wide range of conditions it can address. While the primary applications include the knee, shoulder, back, and ankle, a surprising use is for plantar fasciitis. Each application can be tailored by combining different cut shapes and adjusting the tension applied to the tape. These variations allow for customized support and pain relief, maximizing the tape's therapeutic benefits for different parts of the body and specific injuries or conditions. There are many versions of kinesiology tape. Therefore, it’s important to always read the instructions prior to applying, as there can be variations between brands that can impact the effectiveness of the tape.
NeoTape Visual Tension Guide

A visual tension guide on kinesiology tape is essential for ensuring the tape is applied with the correct tension for each application, which directly impacts the tape's effectiveness. The guide helps users apply the correct amount of stretch, which is crucial for achieving the desired therapeutic benefits such as support, pain relief, and improved circulation. Incorrect tension can lead to suboptimal results, either by not providing enough support or by restricting movement too much. The visual tension guide simplifies the application process, making it accessible for both professionals and individuals using the tape at home.
How to cut Kinesiology Tape

NeoTape Kinesiology Tape can be cut into a range of versatile shapes which act as the building blocks for a variety of applications. Having universal cut shapes across different applications ensures consistent results and makes our application guide straightforward and easy to follow. The cut shapes also combine with the unique NeoTape Visual Tension Guide to indicate the tension required at each part of the shape.
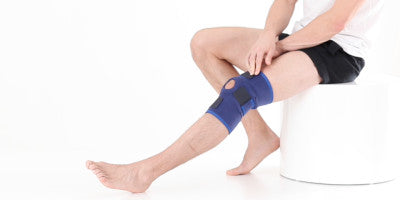
How To Apply Kinesio Tape To Knee
This taping technique is suitable for general knee support and discomfort associated with knee conditions by helping provide stability, improving muscle imbalances and relieving pressure on the joint. For this technique you will require:
- 1 x Smaller I Shape
- 2 x Longer I Shapes
The lengths of the tape will be determined by the size of the user’s leg. The two longer I Shapes should be the same length and will cross from the thigh to below the knee. The smaller I Shape will be placed directly below the kneecap.
After applying each strip use the backing paper to gently rub the area for better adhesion. Apply tape a minimum of 30 minutes before activity and avoid repositioning the tape to prolong the product life.

Step 1. Apply the smaller I Shape with 120% Tension to the middle of the tape and attach below the kneecap. Either side of the tape should be applied with no stretch.

Step 2. Attach the anchor point of the 1st Larger I Shape to the outside of the leg with no stretch. Apply 120% Tension to the tape and attach to the outside of the leg until you reach the kneecap. Apply 140% Tension to the tape across the knee and attach below strip 1 on the inside of the lower leg.

Step 3. Repeat step 2 with the 2nd Longer I Shape on the inside of the leg.
How To Apply Kinesiology Tape To Back
This application technique for the upper back is suitable for general shoulder pain and pain in the upper back (specifically the latissimus dorsi muscles). This technique can also be used for cervical spondylopathy. For this technique you will require:
- 1 x X Shape
- 2 x W Shapes
- 2 x I Shapes
After applying each strip use the backing paper to gently rub the area for better adhesion. Apply tape a minimum of 30 minutes before activity and avoid repositioning the tape to prolong the product life.

Step 1. Using the X Shape apply the middle of the tape to the pain point on the spine with no stretch. Gently stretch the 4 branches away from the spine to form the X Shape. NB: If the stretch guide is on the branches it should form a complete circle indicating 120% stretch.

Step 2. Using 1 of the W Shapes apply the joint part of the strip below the shoulder blade (as pictured) with no stretch. Stretch the 4 branches upwards and around the shoulder blade. Each branch should have 140% stretch indicated by a complete hexagon on the stretch guide.

Step 3. Repeat Step 2 on the opposite shoulder blade for the 2nd W Shape.

Step 4. Using the 1st I Shape apply the base of the strip towards the shoulder with no stretch. Gently stretch the tape towards the neck, the stretch guide should show a complete circle indicating 120% stretch.

Step 5. Repeat step 4 on the opposite shoulder for the 2nd I Shape.
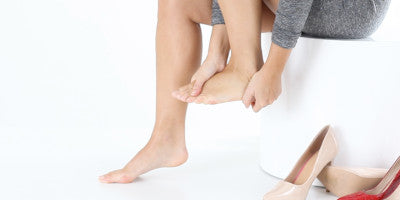
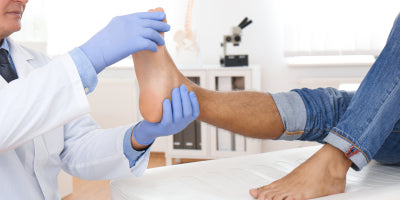
Does kinesiology tape work for plantar fasciitis?
Here is an application technique for kinesiology tape for plantar fasciitis. This taping technique can be used for plantar fasciitis as well as general foot swelling. For this technique you will require:
- 1 x W strip
After applying each strip use the backing paper to gently rub the area for better adhesion. Apply tape a minimum of 30 minutes before activity and avoid repositioning the tape to prolong the product life.

Step 1. Using the W shape apply the base of the tape towards the heel of the foot with no stretch. Apply 120% Tension to each branch and secure on the base of the foot, ensuring each branch finishes between the toes.
Kinesiology tape offers a versatile and effective solution for managing a variety of physical conditions during everyday life and exercise. From understanding what kinesiology tape is and how it works, to mastering the techniques for applying it to different parts of the body, this guide has covered the essentials. Whether you're dealing with knee pain, back issues, or even plantar fasciitis, the proper use of kinesiology tape can provide significant relief and support. Remember, the key to effective taping lies in the correct application, utilizing different shapes and tensions to meet your specific needs. Empowered with this knowledge, you can confidently incorporate kinesiology tape into your injury prevention and recovery routines, optimizing your physical health and performance.


