How to apply Kinesiology tape

Over the past few years there has been an increased availability of Kinesiology tape, with people more confident in applying the tape themselves, rather than historically having a professional apply the tape to them. For those still unsure about how to apply Kinesiology tape, the good news is that fundamentally, all Kinesiology tape can be applied in the same manner. However, there may be slight differences in application between brands. Below, we will explain some key points on how to apply Kinesiology tape as well as how Neo G can help you with application.
Preparation
When applying Kinesiology tape, preparation is key. This includes making sure the area you want to apply tape to is clean and for best adhesion, we would recommend either trimming any hair or shaving the area. We would also recommend using the application guide to understand what shapes and sizes of tape you will require as its important to have these cut before starting to apply.
Cut Shapes
To apply NeoTape, you will be cutting the tape into various shapes. These shapes will then act as your building blocks to form your chosen support constructs.
The I Shape

The X Shape

The Y Shape

The W Shape

The Y to W Shape

Applying the tape
Each application will require different tape techniques but applying each strip of tape will generally be done in the same way.- The tape will be on some form of backing paper. This can either be ripped or if you push a section of the tape against the backing paper it will start to tear the paper
- Once the backing paper is cut then you can carefully peel it back to expose a section of tape while still being able to hold onto the backing tape ready to apply to the skin
- With the two sections of backing paper in hand you can stretch the tape to the advised amount on any guide that you are using. Once stretched place the section down on the skin carefully ensuring there are no wrinkles in the tape
- Depending on the application this may leave two sections with backing paper on that is not applied to the skin yet. For these two sections carefully peel the backing paper while pushing the tape onto the skin with no stretch.
- Once the tape is applied use a section of the backing paper to rub over the tape to help with adhesion
- Repeat for each strip of tape as needed
When applying the tape ensure the muscles that will have tape on are in a stretched position. Failure to do this can result in the tape excessively pulling on the skin when the limb moves or pulling up and not sticking.
NeoTape and the Visual Tension Guide
At Neo G we want to ensure all individuals can apply our products safe and effectively. For our Kinesiology tape, we include a leaflet in each box with some general applications. We also have the application guide which shows a wider range of applications. On the tape itself we include a visual tension guide, which you will see as circular shape. As the tape is stretched the tension guide will change shape to indicate when you are at different tension points required for each application taking all the guess work out of applying the tape at the correct tension guide. Below are the three levels of tension and how the shape on the tape corresponds to that tension.
100% Tension
With the backing paper removed and no stretch on the tape the outside will be an oval and the inside will be a skewed hexagon as shown below

120% Tension
When the tape is stretched and the outside is a circle as shown below the NeoTape is at 120% Tension

140% Tension
When the tape is stretched and the inside is a hexagon as shown below the NeoTape is at 140% Tension

Common Applications
Here, we'll go through two of the most common applications, knee and upper back. You can find more application tutorials for other parts of the body in our Application Guide.
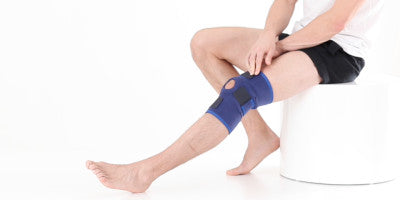
Knee Application
This taping technique is suitable for general knee weakness either through injury or secondary to a medical condition such as arthritis. The use of the W Shape in this application also allows this technique to be used for knee swelling.
For this technique you will require 4 strips of tape consisting of the following:
2 x W Shapes, 1 x Y Shape and 1 x I Shape
After applying each strip use the backing paper to gently rub the area for better adhesion. Apply tape a minimum of 30 minutes before activity and avoid repositioning the tape to prolong the product life.
Step One

Using the 1st W Shape apply the base of the strip to one side of the knee with no stretch. Apply stretch to each branch and apply across the knee joint. NB: If the Visual Tension Guide is on the branches it should show a complete round circle indicating 120% stretch.
Step Two

Using the 2nd W Shape repeat step 1 from the opposite side of the knee.
Step Three

Using the Y Shape apply the strip from the middle of the thigh above the knee and stretch downwards towards the top of the knee with the Visual Tension Guide showing a complete round circle (120% stretch) until you reach the split in the tape. Apply each branch around the knee being careful to not stretch the tape when crossing over strip 1 and 2 and allow each strip to join back up below the knee. NB: For areas where the tape isn’t crossing strip 1 or 2 the tape should be at 120% stretch.
Step Four

Using the I Shape apply the middle of the strip below the knee cap with no stretch. Apply 120% stretch to each side of the strip indicated on the guide by a complete round circle making sure that there is no stretch applied when crossing over strip 1 or strip 2. Wrap each end of the strip around the sides on the knee with no stretch.
Upper Back Application
This taping technique is suitable for general shoulder pain and pain in the upper back (specifically the latissimus dorsi muscles). This technique can also be used for cervical spondylopathy.
For this technique you will require 5 strips of tape consisting of the following:
1 x X Shape, 2 x W Shapes and 2 x I Shapes
After applying each strip use the backing paper to gently rub the area for better adhesion. Apply tape 30 minutes before activity and avoid repositioning the tape to prolong the product life.
Step One

Using the X Shape apply the middle part of the strip with no stretch onto the pain point on the spine. Gently stretch the 4 branches away from the spine to form the x Shape. NB: If the Visual Tension Guide is on the branches it should form a complete circle indicating 120% stretch.
Step Two

Using 1 of the W Shapes apply the joint part of the strip below the shoulder blade (as pictured) with no stretch. Stretch the 4 branches upwards and around the shoulder blade. Each branch should have 140% stretch indicated by a complete hexagon on the Visual Tension Guide.
Step Three

Using the 2nd W Shape repeat step 2 on the opposite shoulder.
Step Four

Using the 1st I Shape apply the base of the strip towards the shoulder with no stretch. Gently stretch the tape towards the neck, the Visual Tension Guide should show a complete circle indicating 120% stretch.
Step Five

Using the 2nd I Shape repeat step 4 for the opposite shoulder.
For more ways to use NeoTape Kinesiology Tape, read through our application guide.


